Lacing Technique
Lacing techniques for different foot shapes
Changing the way you lace up your kicks can completely change the way you feel about your running shoes. We have listed some of the most common shoe issues, and the solutions in lace form. Read on and your arches, heels and toes will thank you.
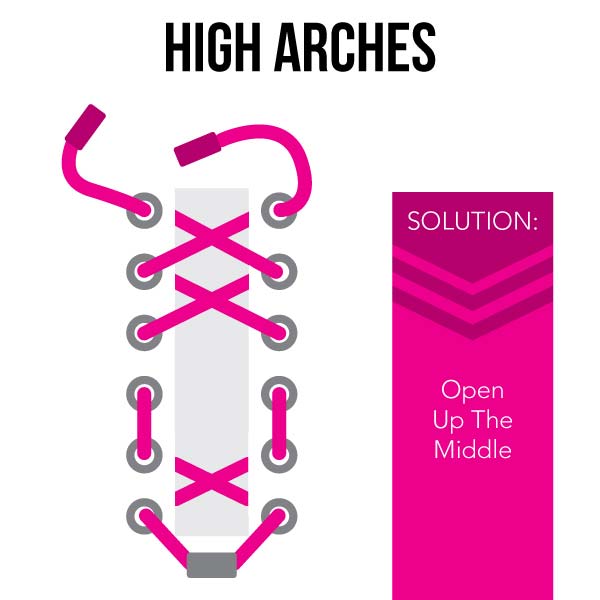
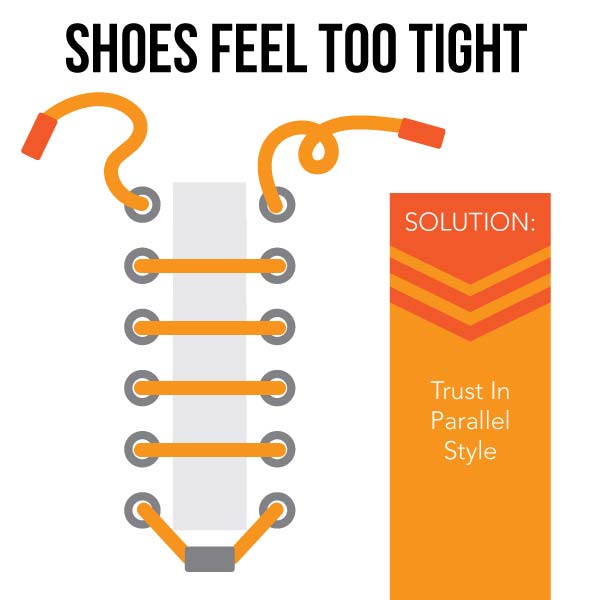
Start by lacing your shoe at the bottom like you normally would, evening up the laces through the bottom eyelets. Cross the laces and thread them to the second eyelets normally. Now, here is the crucial part – take the laces directly up the shoe (not crossing the tongue) into the next row of eyelets, leaving an open area in the middle of the shoe. Just keep lacing crisscross style until you reach the top.
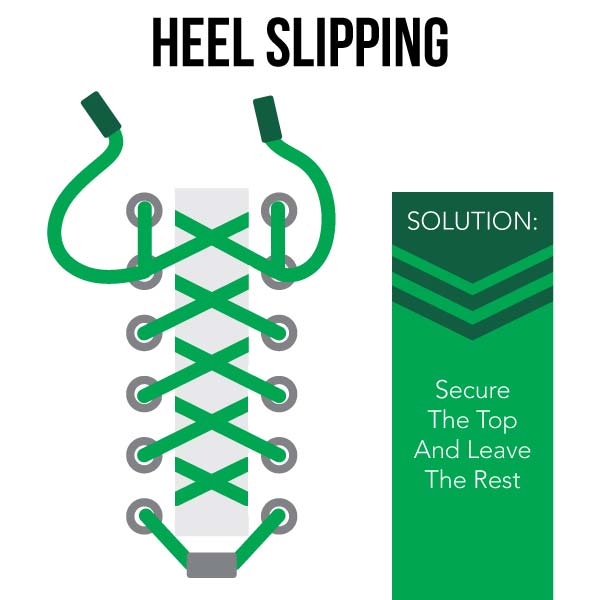
No one wants to feel like they are running on banana peels. This one is fairly straightforward as you lace your shoes normally until one eyelet remains on each side. Lace each side straight up the outside of the shoe into the last eyelet, leaving a loop on either side. Crisscross each lace across the shoe and pull it through the opposite loop and tie as normal. These loops help pull up the shoe material around your ankle to secure your heel in place without tightening the rest of your shoe differently.
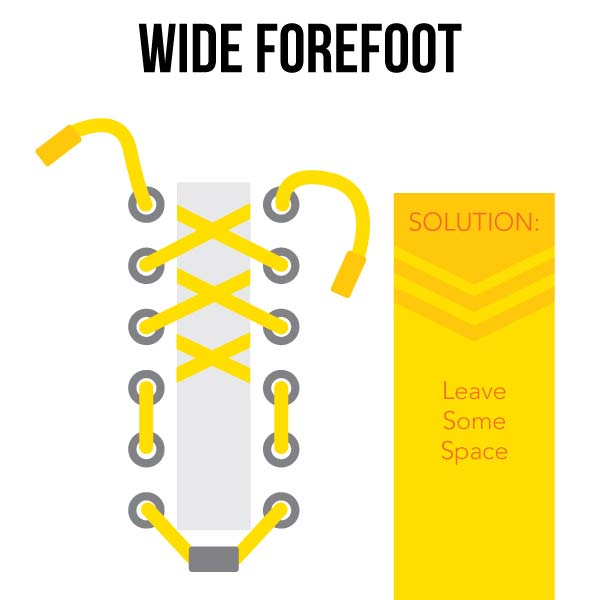
Get some air down there! This one is similar to what we did with High Arches, but placing the gap lower. Start by lacing your shoes evenly at the bottom, then start working up the outside. Lace each side into the first eyelet up the side of the shoe. Do this twice to the middle of the shoe to the third eyelet on each respective side. Then just lace up normally and your feet will have plenty of room to work with while you run.
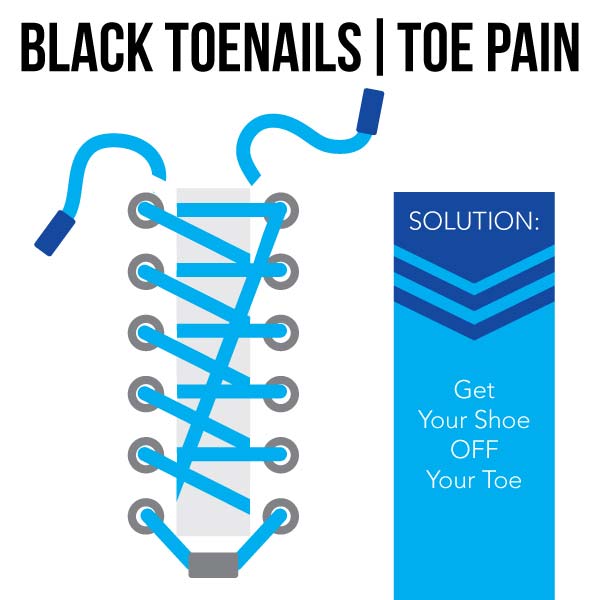
This is a common problem with an interesting technique to help your toes. Start by threading one side of your laces at the top of your shoe on the opposite side of your big toe. Make sure to leave enough lace to tie your shoes. Then take the lace down to the end of your shoe closest to your big toe to the bottom eyelet making a diagonal line. Now simply lace up your shoe with this single long lace normally in a zig zag fashion. You’ll notice now when tying each shoe that the bit of shoe above your big toe gets pulled away from your nail while allowing the rest of your shoe to be tied up tight.
This one looks simple, but can be a bit tricky. Start by lacing the first two eyelets on the same side on the big toe side of your shoe. From here we are going to follow a pattern. Take the lower lace and cross it to the other bottom eyelet and put the lace down through it. Take that same lace, skip the second eyelet and thread it up through the third eyelet, then cross it over the tongue and down through the opposite side eyelet. Follow this pattern up the shoe. Do the same pattern with the other side of the lace on the remaining eyelets. You’ll notice at the top that one of the laces will go right in perfectly with the top eyelet and the other is a tad short. Just pull up the remaining lace along the same side of the shoe to the top eyelet and you will be all done. Avoiding the standard crisscross pattern in this style allows the top of the foot to have more room, giving you much more comfort while still getting support.
